|
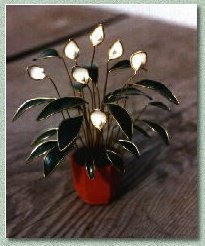
NAIL
POLISH FLOWERS
~~~~~~~~~~~~
SPATHYPHYLUM
These
are instructions for one flower. The same idea can be used for any
flower you may want to make. Keep in mind, that the smaller the leaf or
bloom, the smaller gauge of wire you will want to use.
|
Supplies
you will need..
*Brass
wire on a spool (anywhere from 18-22 gauge)
*Clear
nail polish (the older and thicker, the better)
*White
acrylic paint
*Leaf
Green acrylic paint (or darker)
*Tacky
glue
*Medium
size soft bristle brush for paints
*Tweezers
*Wax
paper and paper towel
*Large
piece of Styrofoam
*1"
flowerpot filled with clay, covered with fine ballast.
*Flower
stamens
|
|
|
STEP
ONE:
Cut
wire to lengths of approx. 4 1/2 inches.
Shape
wires like Illustration #1.
Make
about 15 leaves and about 9 flower shapes.
Form
the shape by placing it across a 1/2" dowel to meet the other wire.
Wire
must be touching. See Illustration #2
Clip
off excess wire that forms the leaf or flower and then, using a knife,
form the point at the tip of the flower or leaf by pulling it out to a
point.
Keep
the round or oval shapes of the leaf and flower as much as possible
|
|
|
STEP
TWO
Fill
brush of nail polish applicator with a generous amount of polish.
Apply
polish either under the bloom or over the top, whichever is easier for
you.
Apply
polish by laying the brush horizontally across the blooms and leaves.
Start at one end and move slowly to the other end. See Illustration
#3
Be
patient - you may have to go across several times before polish makes a
solid "bubble" across wires. After a "bubble"
is made - lightly blow onto it to speed drying. You may have to
move the wire up and down to prevent a clump of polish forming in
center. You want an even thickness from one end to the other.
When you're sure it's not going to run, stick stem horizontally into
Styrofoam to prevent uneven thickness.
Finish
all leaves and blooms. Dry completely for at least one hour.
After
the polish is completely dry and not sticky, curve the leaves and blooms
over a dowel as in Illustration #4.
|
|
|
STEP
THREE
Paint
the backside of leaves green and the backside of blooms white.
Set
in Styrofoam to dry. Illustration #5.
|
 |
|
STEP
FOUR
Cut
white stamen bulbs to a short length as in Illustration
#6.
Squeeze
a small amount of tacky glue onto wax paper and dip thread end into
glue. Using tweezers, place in the center front of bloom as in Illustration
#7. Let dry.
|

|
|
STEP
FIVE
Some
wires may need to be clipped off so they don't sit too high in pot.
The longest wire of blooms should not be more than 3 1/4".
The longest wire of the leaves should not be more than 3" tall.
Arrange
leaves in pot starting in the center with the larger leaves. Work
your way to the outside edges with the medium and smaller leaves.
Add blooms in random areas, in with the leaves.
|
HINTS:
-Do not
use new nail polish. It will not work well to form a bubble and will
take longer to apply.
-If a
hole appears in the "bubble" after you place it in the Styrofoam to
dry...don't worry, just repeat Step Two above.
-Colored
nail polish does not work as well as painting the clear polish.

Use your back button to return to Craftroom for additional
projects
contributed by rosebuds
|